Are you tired of your bed sheets always coming untucked and messy? If so, we have the perfect solution for you – mastering the art of making hospital corners on your bed. This simple yet effective technique will not only enhance the overall appearance of your bed but also keep your sheets neatly tucked in throughout the night, providing you with a comfortable and organized sleeping experience. In this article, we will guide you step by step on how to achieve perfectly crisp and polished hospital corners, ensuring a clean and tidy bed that rivals those in luxury hotels.
Materials Needed
To make hospital corners on your bed, you will need a few essential materials. These include:
Fitted sheet:
Start by ensuring you have a fitted sheet that properly fits your mattress. The fitted sheet is designed with elastic corners that snugly secure it to the mattress, ensuring a smooth and wrinkle-free surface to sleep on.
Flat sheet:
Next, you’ll need a flat sheet. This is the sheet that goes over the fitted sheet and under any blankets or bed covers. It adds an extra layer of comfort and serves as a barrier between you and the blanket or quilt.
Pillowcases:
Pillowcases are essential for keeping your pillows clean and protected. Make sure you have enough pillowcases to cover all the pillows on your bed.
Mattress:
Of course, you will need a mattress as the base for your bed. Choose a mattress that suits your comfort preferences and provides adequate support for a good night’s sleep.
Bed cover or quilt:
Finally, you’ll need a bed cover or quilt to add warmth and style to your bed. This can be a decorative duvet cover, a cozy quilt, or any other type of bed covering that suits your personal taste.
Now that you’ve gathered all the necessary materials let’s move on to preparing your bed.
Preparing the Bed
Before you can start making those perfectly crisp hospital corners, you need to prepare your bed properly. Here are the steps to follow:
Remove all bedding:
Start by stripping off all the existing bedding from your mattress. Remove the fitted sheet, flat sheet, pillowcases, and any blankets or covers that are already on the bed.
Clean the mattress:
Take this opportunity to clean your mattress. Vacuum or wipe away any dust or debris that may have accumulated. This will ensure a fresh and hygienic sleeping surface.
Iron the sheets:
If your sheets are wrinkled, it’s a good idea to iron them before making your bed. Smooth, wrinkle-free sheets will make the process of creating hospital corners much easier.
Choose the top sheet:
If you prefer using a top sheet, select one that complements your bedding and personal style. The top sheet is the one that will go over the fitted sheet and under any blankets or bed covers.
Ensure proper bed positioning:
Before you start laying your sheets, make sure your bed is positioned correctly in your room. Ensure it is centered and in a comfortable location that allows easy access from all sides.
With your bed prepared, it’s time to move on to laying the fitted sheet.

This image is property of content.artofmanliness.com.
Laying the Fitted Sheet
The fitted sheet is the first layer that goes directly onto your mattress. Here’s how to lay it properly:
Spread the fitted sheet evenly:
Start by positioning the fitted sheet evenly over your mattress. Make sure the elasticized corners line up with the corners of your mattress.
Align the corners with the mattress:
Once the fitted sheet is in place, check that each corner lines up correctly with the corresponding corner of the mattress. This will ensure a snug fit and prevent the sheet from coming undone during the night.
Tuck excess fabric under the mattress:
If you have any excess fabric hanging over the sides of your mattress, tuck it neatly underneath. This will create a clean and polished look while also preventing the sheet from moving around as you sleep.
Now that you’ve mastered laying the fitted sheet, it’s time to move on to placing the flat sheet.
Placing the Flat Sheet
The flat sheet adds an extra layer of comfort and protection to your bed. Here’s how to position it properly:
Position the flat sheet evenly:
Lay the flat sheet over the fitted sheet, ensuring it is centered and even on the bed. Smooth out any wrinkles or creases as you go.
Leave extra length to create hospital corners:
When positioning the flat sheet, make sure to leave some extra length at the foot of the bed. This additional fabric will be used to create the signature hospital corners.
Align the top edge with the top of the mattress:
To achieve a neat and tidy appearance, make sure the top edge of the flat sheet lines up with the top edge of your mattress. This will give your bed a crisp and finished look.
With the flat sheet in place, it’s time to move on to creating those perfectly folded hospital corners.

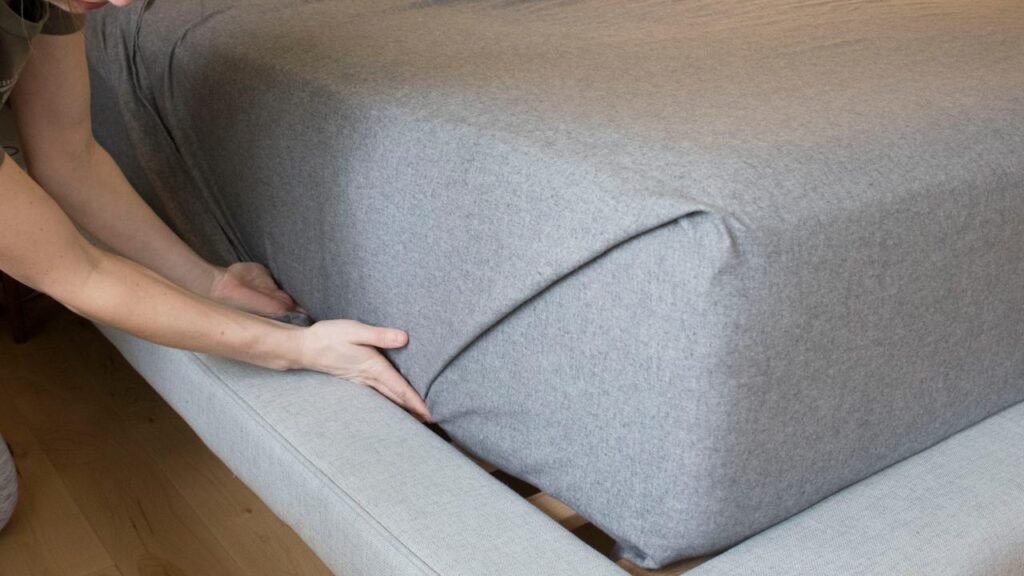
This image is property of cdn.apartmenttherapy.info.
Creating the First Hospital Corner
Hospital corners are a classic technique for creating a neatly tucked bed. Here’s how to create the first corner:
Lift the mattress corner:
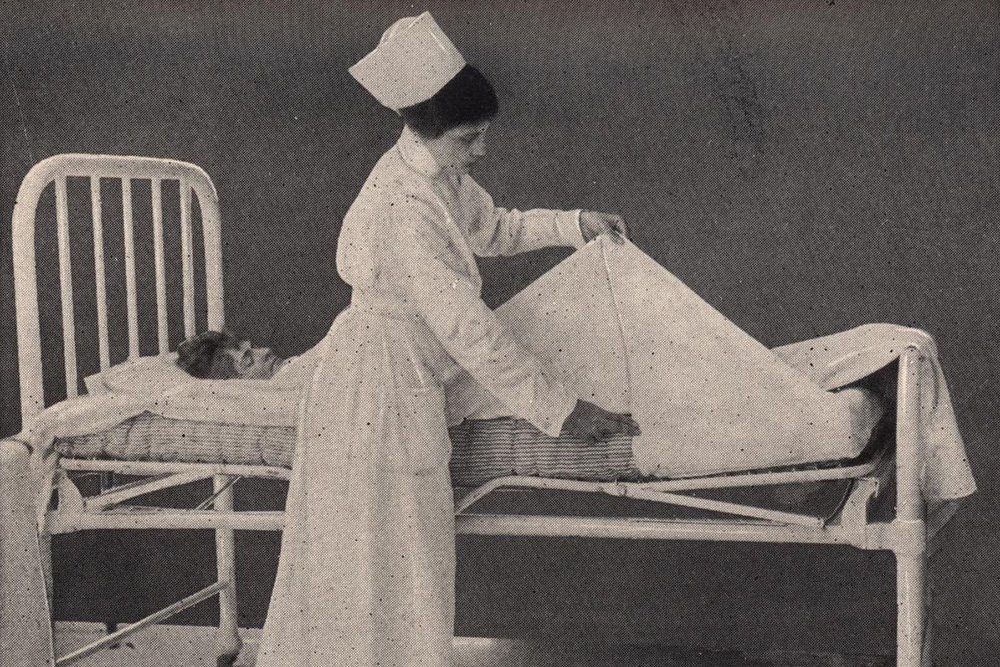
Starting at the foot of the bed, lift the mattress corner where the extra length of the flat sheet hangs.
Hold the excess sheet at a 45-degree angle:
While holding the lifted corner of the mattress, take the excess sheet at a 45-degree angle from the corner.
Tuck the excess sheet under the mattress:
With the excess sheet in hand, fold it neatly and tuck it under the mattress. This will create a tight and secure corner that won’t come undone.
Forming the Second Hospital Corner
Once you’ve mastered the first hospital corner, it’s time to move on to the second one. Here’s how it’s done:
Lift the mattress corner diagonally opposite the first:
Similar to the first corner, lift the mattress corner diagonally across from the corner where you made the first hospital corner.
Hold the excess sheet at a 45-degree angle:
Once again, hold the excess sheet at a 45-degree angle from the corner you lifted.
Tuck the excess sheet under the mattress:
Fold the excess sheet neatly and tuck it under the mattress, just like you did with the first corner. This will give your bed a beautifully tailored appearance.
With the bottom hospital corners complete, let’s move on to making the top hem of the flat sheet.

This image is property of media.remodelista.com.
Completing the Bottom Hospital Corners
Before moving on to the top hem, there are a few final steps for ensuring your fitted sheet is perfectly in place:
Smooth the sheet and tuck any excess fabric:
After creating the hospital corners, smooth out the flat sheet and ensure that there are no wrinkles. If you have any excess fabric hanging out from the sides of the mattress, tuck it neatly underneath for a clean finish.
Secure the sheet tightly under the mattress:
To ensure your fitted sheet stays in place throughout the night, make sure it is securely tucked under the mattress. This will prevent any shifting or bunching while you sleep.
Now that your fitted sheet is secure, it’s time to move on to making the top hem of the flat sheet.
Making the Top Hem
The top hem adds a polished and finished look to your bed. Here’s how to create a neat and even top hem:
Fold the top edge of the flat sheet:
Start by folding a portion of the top edge of the flat sheet towards the foot of the bed. The width of the fold can vary depending on personal preference.
Create a neat and even top hem:
After folding the top edge, smooth it out to create an even and crisp top hem. Make sure the fold is straight and free of any wrinkles or creases.
Tuck the hem under the mattress:
Finally, tuck the folded top hem of the flat sheet under the mattress. This will secure the sheet in place and complete the polished look of your bed.
Now that you’ve mastered the art of making hospital corners and creating a perfectly folded top hem, it’s time to add the finishing touches to your bed.

This image is property of www.nursing.virginia.edu.
Adding Pillowcases
Pillowcases are an essential part of any well-made bed. Here’s how to add them to your pillows:
Place the pillows on the bed:
Start by arranging your pillows on the bed in a way that suits your personal preference. You can choose to have them stacked or positioned side by side.
Insert pillows into the pillowcases:
Take each pillow and insert it into its corresponding pillowcase. Make sure to fully encase the pillow, leaving no gaps or loose fabric.
Arrange the pillows neatly:
Once your pillows are in their cases, arrange them neatly on the bed. You can stack them or arrange them in a decorative pattern, depending on your desired aesthetic.
Adding Bed Cover or Quilt
To complete the look of your bed, it’s time to add a bed cover or quilt. Follow these steps to achieve a cozy and stylish finish:
Center the bed cover or quilt on the bed:
Place the bed cover or quilt on top of your neatly arranged sheets and pillows. Make sure it is centered on the bed for a balanced and symmetrical look.
Smooth and adjust the cover evenly:
Once the cover is in place, smooth out any wrinkles or creases. Adjust the cover until it is evenly spread over the bed, ensuring a clean and polished appearance.
Tuck the sides under the mattress:
To keep the bed cover or quilt securely in place, tuck the sides under the mattress. This will prevent it from shifting or bunching up while you sleep.
Congratulations! You have successfully mastered the art of making hospital corners on your bed. With these steps, your bed will not only be beautifully made but also inviting and cozy for a restful night’s sleep. Sweet dreams!

This image is property of hgtvhome.sndimg.com.


